Battle Arena
For this project, i chose to base my battle arena on Ancient Rome. This decision was made primarily because i took great influence in the history and the architecture, as well as being a fan of films and television series based on events in Ancient Rome, such as Gladiators, Spartacus and 300.
Research: (Week 1 - 2)
At first, i conducted several research pieces to understand what Ancient Rome was like, so i gathered many pictures and created a mood board of the architecture of buildings, gladiator arenas and the environments.
Mood board:
Referencing from films/Television:
As i enjoyed and was heavily inspired by many films, i had screenshot pictures of the environment and looked closely at the architecture of the buildings.


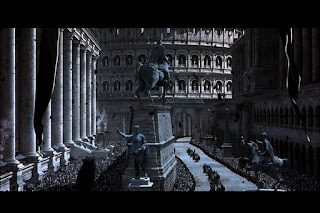
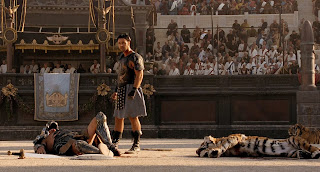
Gladiator (2000)

300 (2007)
Ideas:
The idea i choose to develop further was design two. I find the layout unique and i wanted to see what the outcome would be for when i start modelling in Maya.
Modelling in Maya, UV Mapping and Texturing: (Week 3 - 20)
For the majority of the project i had been modelling all objects in Maya as well as applying textures to give a realistic appearance as well as being able to easily identify each one.
Flag:
Flags are widely used in Rome and i thought it would be essential for me to use in my battle arena. The flag would also give colour to the scene as it would be red, whereas the arena will be based in a desert-like environment, as well as architecture consisting of light colours.
Firstly, i modelled the flag in Maya, i used an ncloth and attached it to the pole so when i pressed play on the animation below, the flag would hang in the manner of a cloth. I then pressed pause to keep the flag in the place where i wanted it to hang and i froze the flag by clicking on edit and delete by type and history and then went to click on modify and freeze transformation. I combined the flag together ready to texture it.
Making sure all parts of the flag were selected, I opened up UV Editor an organised all individual parts of the flag and neatly laid them out. I then took a UV Snapshot, saved it and opened it up in Photoshop.
In Photoshop the layout appears to be the exact same as it was in Maya as i took a Snapshot and saved it. I then applied a black background so it was easier for me to see the lines.
I then coloured all the individual parts the colours i wanted the flag to be. The red represents the flag whereas the brown is the pole. Back in Rome, metal was not used much in flag poles so i thought that a wood coloured texture would be better to use. Once completed i saved it as a .tga file.
I imported the .tga file by ensuring i had object mode on and right clicked on the flag and pressed assign new material and selected lambert, i then opened up the .tga filed and pressed 6 so that the colour would be displayed on the flag.
Door:
With the door, i simply done the same processed with the flag, but when designing my own texture i painted the door a brown colour. The door handle however, i applied a gold texture.
Barrel:
This is the outcome of barrel with texture.
Stones:
Using the same method, i opened up Photoshop and painted in the lines grey to represent a rock. I then used a soft brush and randomly painted on small darker grey spots to give the rock more of a texture.
Sand:
For the sand, i created a plane and used the sculpting tool to create mountains and rifts to give it the texture that sand would have. I did not create my own texture as i found it hard to produce a similar texture that represented sand, instead i browsed the internet and came across several different patterned sand textures. I picked a texture and simply applied it as a favourite new material and a lambert, however when i first applied it, the sand looked repetitive in pattern, so i opened up the UV editor and move the mesh around to make the sand appear it is going in a different direction otherwise it will look unrealistic.
Architecture:
With the buildings and the roof, i applied a stone texture to the buildings and columns and a red tiled texture to the roof. I had done this by assigning a new material and clicking on lambert, i then opened up the textures and applied it. I did this because there is a lot of architecture and there was not many textures that needed to be applied.
Market Stalls:
With the market stalls, i had applied a wooden texture to the boxes and stone to the main body of the stall and red for the cloth, the same colour as the flag. I felt it made the environment stand out as a lot of light colours such as beige and white were used.
The wagon only consisted of a wood texture which i had applied. I put in a total of two wagons and put barrels in one and stones in the other to give the environment a bit more depth.
Unity:
Once the environment was finished and all models were textured and the layout was put in place, i then selected the whole of environment and exported it as an FBX file and imported it into Unity.
I had to reassign the textures and then i created a camera and clicked on windows then animation in order for the animation screen to pop up. With the camera i had slowly moved it in different positions whilst capturing each frame to create a short animation of the scene.


No comments:
Post a Comment